


Cooking with kids can be a fun and educational activity. Not only does it teach them important life skills, but it also allows them to express their creativity in the kitchen. In this article, we will explore seven easy recipes that kids can make at home. So, put on your aprons, gather your ingredients, and let's get cooking!
Introduction to Cooking for Kids
Introducing kids to the world of cooking at an early age is a great way to foster their independence and boost their confidence. Not only will they learn how to follow instructions and measure ingredients, but they will also develop an appreciation for where their food comes from.
However, before diving into the kitchen, it's essential to understand the importance of teaching kids to cook and the safety measures that should be taken.
The Importance of Teaching Kids to Cook
Teaching kids to cook is about more than just preparing a meal. It is an opportunity to teach them about nutrition, encourage creativity, and build a foundation for a healthy lifestyle. By involving children in the cooking process, they develop a better understanding of the ingredients they are using and are more likely to make healthier choices.
When kids actively participate in cooking, they become more aware of the nutritional value of different foods. For example, they might learn that vegetables are packed with vitamins and minerals that are essential for their growth and well-being. This knowledge can help them make informed decisions about their food choices, leading to a healthier diet.
Add to that the sense of accomplishment they feel when they successfully make a dish, and you have a recipe for building their confidence and self-esteem. When children see the end result of their efforts, whether it's a beautifully decorated cupcake or a perfectly seasoned salad, they gain a sense of pride and accomplishment that boosts their self-confidence.
Moreover, cooking provides an outlet for creativity. Kids can experiment with different flavours, textures, and colours, turning their dishes into works of art. This creative expression not only makes cooking fun but also encourages children to think outside the box and develop their own unique culinary style.
Safety Tips for Kids in the Kitchen
Before starting any cooking adventure, it's important to go over some safety guidelines with your little chef. Teach them the importance of using oven mitts, handling sharp knives with caution, and keeping their hands washed and clean.
When it comes to using oven mitts, children should be taught to wear them whenever they handle hot pots, pans, or baking trays. This simple precaution can prevent burns and ensure their safety in the kitchen.
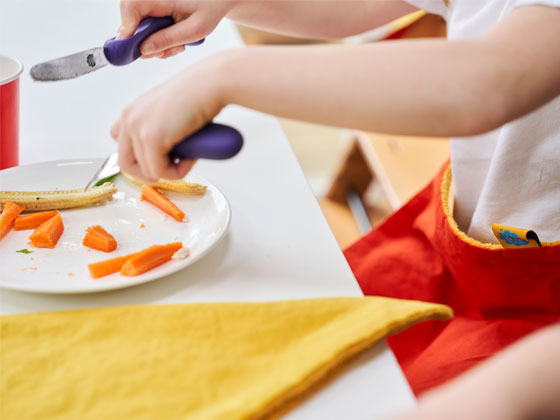
Handling sharp knives is another crucial aspect of kitchen safety. Kids should be taught to use knives appropriate for their age and skill level, and always under adult supervision. Emphasise the importance of holding the knife correctly and cutting away from their bodies to avoid accidents.
Additionally, supervise younger children closely and teach them not to touch hot surfaces or appliances. Explain the dangers of hot stovetops, ovens, and other kitchen appliances, and establish clear boundaries to keep them safe.
With a few simple safety precautions in place, you can ensure that your time in the kitchen is both enjoyable and accident-free. By teaching kids how to cook safely, you are equipping them with valuable life skills that will stay with them as they grow.
Recipe 1: Peanut Butter and Jelly Sandwich
Let's start with a classic favourite - the peanut butter and jelly sandwich. This recipe is perfect for beginners as it requires no cooking or sharp utensils.
Before we dive into the step-by-step instructions, let's talk a little bit about the history of this iconic sandwich. The peanut butter and jelly sandwich, also known as a PB&J, has been a staple in American households for decades. Its origins can be traced back to the early 20th century when peanut butter became commercially available and jelly or jam was a common pantry item.
Now, let's gather the ingredients needed to make this delicious sandwich:
Ingredients Needed
- 2 slices of bread
- 2 tablespoons of peanut butter
- 2 tablespoons of jelly or jam
Once you have all the ingredients ready, it's time to put them together. Here's a step-by-step guide:
Step-by-Step Instructions
- Start by selecting your preferred type of bread. Whether you like whole wheat, white, or even a gluten-free option, the choice is yours. The bread serves as the foundation of your sandwich, so choose one that you enjoy.
- Using a butter knife or a spoon, spread a generous amount of peanut butter on one slice of bread. You can choose between creamy or crunchy peanut butter, depending on your texture preference.
- Next, take the other slice of bread and spread an equal amount of jelly or jam on it. Strawberry, grape, raspberry, or even mixed fruit jam are popular choices.
- Now, carefully place the peanut butter-covered slice of bread on top of the jelly-covered slice, creating a sandwich.
- If you prefer smaller portions, you can cut the sandwich into halves or quarters. This step is optional, but it can make it easier to handle and share.
And there you have it! Your delicious and easy peanut butter and jelly sandwich is now ready to be enjoyed. The combination of the creamy peanut butter and the sweet and fruity jelly creates a perfect balance of flavours that will satisfy your taste buds. It's perfect for a quick snack, a school lunch, or even a picnic in the park.
Now that you know how to make a classic PB&J sandwich, feel free to get creative and experiment with different variations. You can add sliced bananas, honey, or even sprinkle some cinnamon for an extra kick. The possibilities are endless!
Recipe 2: Scrambled Eggs
Now, let's move on to a breakfast classic - scrambled eggs. This recipe will teach your little ones some essential cooking skills, such as cracking eggs and safely using a stovetop.
Scrambled eggs are a versatile dish that can be enjoyed for breakfast, lunch, or even dinner. They are quick and easy to make, making them a perfect option for busy mornings or when you're in need of a simple yet satisfying meal.
Ingredients Needed
- 2 eggs
- 2 tablespoons of milk
- Salt and pepper to taste
- Butter or cooking spray
Before we dive into the step-by-step instructions, let's talk about the ingredients. Eggs are the star of this dish, providing a good source of protein and essential nutrients. Adding a splash of milk helps make the scrambled eggs extra creamy and fluffy. Don't forget to season with salt and pepper to enhance the flavour.
Step-by-Step Instructions
- In a bowl, whisk together the eggs, milk, salt, and pepper. Whisking the eggs thoroughly helps incorporate air into the mixture, resulting in light and fluffy scrambled eggs.
- Heat a non-stick frying pan over medium heat and add butter or cooking spray. Ensuring that the pan is well-heated prevents the eggs from sticking and promotes even cooking.
- Pour the egg mixture into the pan and let it cook undisturbed for a few seconds. Allowing the eggs to set slightly before scrambling helps create larger curds and a more visually appealing dish.
- Using a spatula, gently scramble the eggs, breaking them into smaller pieces. Be careful not to over mix, as you want to maintain some larger curds for texture.
- Cook for another minute or until the eggs are fully cooked but still soft. Overcooking can result in dry and rubbery eggs, so it's important to keep an eye on the cooking time.
Yum! Your fluffy and delicious scrambled eggs are now ready to be served. They make a tasty and nutritious breakfast option.
Scrambled eggs can be enjoyed on their own or paired with various accompaniments. You can serve them with a side of crispy bacon, toast, or fresh fruit for a well-rounded meal. Get creative and add some chopped herbs, grated cheese, or diced vegetables to elevate the flavour and nutritional value of your scrambled eggs.
Now that you've mastered the art of making scrambled eggs, you can experiment with different techniques and variations. Try making fluffy scrambled eggs using only egg whites or add a touch of cream for an extra indulgent version. The possibilities are endless!
So next time you're in need of a quick and satisfying meal, remember this simple scrambled eggs recipe. It's a classic for a reason - delicious, nutritious, and loved by both kids and adults alike.
Recipe 3: Homemade Pizza
Pizza night just got more exciting with this easy homemade pizza recipe. Your little chefs will have a blast customising their own pizzas with their favourite toppings.
Imagine the aroma of freshly baked pizza wafting through your kitchen, as you embark on a culinary adventure with your loved ones. The joy of creating something from scratch and the anticipation of that first bite make this homemade pizza recipe a must-try.
Ingredients Needed
- 1 pre-made pizza crust (or make your own from scratch!)
- 1/2 cup of tomato sauce
- 1 cup of shredded mozzarella cheese
- Assorted pizza toppings (e.g., pepperoni, bell peppers, mushrooms)
Let's dive into the world of flavours and textures by gathering all the necessary ingredients for this pizza extravaganza.
Step-by-Step Instructions
- Preheat the oven to the temperature specified on the pizza crust packaging.
As the oven preheats, the tantalising smell of anticipation fills the air. The warmth of the oven promises to transform simple ingredients into a masterpiece.
- Spread tomato sauce evenly over the pizza crust using a spoon or spatula.
Take a moment to appreciate the rich, vibrant red colour of the tomato sauce as it glides effortlessly onto the pizza crust. The tangy aroma of the sauce hints at the burst of flavours that will dance on your taste buds.
- Sprinkle shredded mozzarella cheese on top of the sauce.
Watch as the milky-white strands of mozzarella delicately blanket the pizza, creating a creamy and indulgent layer. The cheese, known for its melty perfection, promises to create a gooey and irresistible experience.
- Add your favourite pizza toppings, distributing them evenly.
Let your imagination run wild as you scatter an assortment of toppings across the pizza canvas. Each slice will be a unique masterpiece, reflecting the personal preferences and creativity of the chef.
- Bake the pizza in the preheated oven for the recommended time.
As the pizza bakes, the heat transforms the raw ingredients into a harmonious symphony of flavours. The crust turns golden brown, the cheese bubbles and melts, and the toppings sizzle with a tantalising aroma.
Mamma mia! Your homemade pizza is now ready to be devoured. Get ready for a cheesy and delicious culinary creation.
As you gather around the table with your loved ones, the anticipation builds. The first bite is a harmonious explosion of flavours, as the tangy tomato sauce dances with the creamy mozzarella and the medley of toppings. The crust offers a satisfying crunch, complementing the melty cheese and savoury toppings.
Each slice is a celebration of culinary creativity, a testament to the joy of homemade cooking. So saver every bite, share stories, and create lasting memories around this delightful homemade pizza.
Recipe 4: Fruit Salad
For a refreshing and healthy treat, let's dive into making a colourful fruit salad. This recipe is a great way to introduce your little ones to different fruits and encourage them to eat their daily servings.
Ingredients Needed
- Assorted fresh fruits (e.g., strawberries, bananas, grapes, watermelon)
- 1 tablespoon of honey or lemon juice (optional)
Step-by-Step Instructions
- Wash and prepare the fruits by removing any seeds or peels.
- Cut the fruits into bite-sized pieces and place them in a large bowl.
- If desired, drizzle honey or lemon juice over the fruit to add a touch of sweetness.
- Gently toss the fruits together to combine all the flavours.
Ta-da! Your vibrant and delicious fruit salad is ready to be enjoyed. It's a healthy and refreshing snack that kids will love.
Now, let's talk about the benefits of incorporating fruit salads into your family's diet. Fruits are not only delicious but also packed with essential vitamins, minerals, and antioxidants. They provide natural sugars that give you energy and keep you hydrated. By including a variety of fruits in your salad, you can ensure that your little ones get a wide range of nutrients.
Strawberries, for example, are rich in vitamin C, which helps boost the immune system and promotes healthy skin. Bananas are a great source of potassium, which supports heart health and aids in muscle function. Grapes contain antioxidants that protect against cellular damage, and watermelon is hydrating and refreshing.
When making a fruit salad, it's important to involve your kids in the process. Let them help you select the fruits at the grocery store or farmer's market. This way, they can learn about different fruits and their unique flavours. Encourage them to wash and prepare the fruits, teaching them valuable kitchen skills and fostering independence.
Additionally, you can make the fruit salad more enticing by adding a sprinkle of chia seeds or a dollop of Greek yogurt on top. Chia seeds are an excellent source of omega-3 fatty acids and fibre, while Greek yogurt provides protein and probiotics for a healthy gut.
These seven easy recipes are just the beginning of your culinary adventures with your little ones. Remember to have fun, be patient, and encourage their creativity in the kitchen. Before you know it, they'll be whipping up their own gourmet meals!